Showing posts with label tile. Show all posts

Tuesday, January 18, 2022

Chateau Conservatory

What is it with my obsession with flooring?? I decided to purchase the terra cotta embossed paper that is the same brand as the kitchen paper tile. I had briefly considered this terra cotta for the kitchen, something about terra cotta clay for kitchens is stuck in my brain. But I did that in the French Country and think the kitchen will be better in the tile, and the new cabinets.

So I am now contemplating using it for the conservatory. It seems to flow nicely with the wicker and the probable wallpaper. I am not keen on the 2nd tile floor I made for it - I posted a picture below so its easy to consider each. Funny, I was stoked about getting enough marble tile to do this large floor. There's a couple of things that just hit me wrong - I had grouted them but not every tile is adhered flatly to the floor, so its kind of bumpy but because its shiny, its more obvious. 


Saturday, December 04, 2021

Chateau Kitchen floor

 I've been considering making quarry tiles but I'm not sure if that is really ever going to happen. I happened upon some tile that is a card, embossed, from Streets Ahead. I figured I'd give it a shot and see if it works. I'm pleasantly surprised. Who knows, maybe it will stay.


Wednesday, October 06, 2021

Chateau Conservatory Floor upgrade

 Conservatory Floor

Last I left it, the conservatory floor was barely satisfactory I had used Lawbre grey marble flooring that I had in my stash for years, and since this is the last house I will be doing, I was bound and determined to use them. The marble pattern was just to stark and the contrast was causing the overall look to be way too busy. I fiddled with it (worst possible thing I could do) and ended up doing lots of extra work to undo the fiddling. Then I washed a white/ivory over the tiles to tone down the contrast. That made it potentially worth keeping.

As these things go, it has been gnawing on me that it is just not going to work and cost and effort be damned. I bought enough old stock of Magic Mini Ivory marble tile to cover this size floor, and started with new cardstock. I butted them, leaving no spaces...like I did for the Foyer. I got as far as 3 or 4 rows and realized the sizes on each tile are just barely different. I left it for several days to stew. After seeing it and seeing another person's efforts with the same brand (different color) where they were butted, I decided to rip them off and start over, spacing them just a bit. 

First, the cardstock wasn't sturdy enough...so I went back to my old standby - plastic For Sale signs. As I laid the tiles out, I realized I could lay out exact size tiles all the way across, with just barely spacing. This eliminated the need to cut them (though I've successfully cut these formica tiles before with my Mini Chopper). So I glued all tiles, and then applied some grout. 

I'm very pleased with the results, and the plastic base gave it just the right amount of support. The ivory/cream colors go much better with the overall color scheme I have. 

Old Floor:


Working on new floor:


Sunday, August 22, 2021

Chateau foyer

I was able to wallpaper the foyer this weekend, which entailed reordering more of the mural paper because 2 of 4 sheets were a darker run. The new stock was all lighter, and I then used the 2 darker as templates to plan the pattern placement. That actually worked well, and once I had the plan in place I just started cutting pieces. The challenge here was that the pattern between the panels was wider, and this is a small room. I decided to therefore force a narrower pattern, which meant the compromise was more piecing together. 

In the end I think it looks nice and I'm pleased with it. That's not to say I would do that again, I probably spent way too much time debating and cutting. Anyway, it's done, and I was able to move on to gluing the ceiling in place and wallpaper the 2nd floor hall as well. 

You can also see the marble floor that I finished earlier, very happy with that as well!


Sunday, February 17, 2019

Bathroom Wallpaper and Floor

The French Country bathroom is the last room that I've waited to tackle. I bit the bullet and glued the 2nd floor wing onto the house. I previously had wired the Study and the tapewire was done on the bathroom floor. I had previously been planning on the paper and layout, just needed to do the work.

The wallpaper templates took me a few hours, and then cutting and gluing the wallpaper on. I'm very happy with the effect. Next, I tackled the flooring. I used World Model tile cardstock, cutting off the greek key borders, and since the room is large, pieced together 2 sections. I still need to glue it to a posterboard base, as I don't want it to be permanently attached in case I need to access the wiring.

Once the paper is completely dry, I will cut out the window.


Sunday, March 19, 2017

Flooring and Wallpapers

The foyer wallpaper was put up, and I wasn't happy with that, there were wrinkles. So I stripped it and put up another, and I'm happy with it.


The kitchen tiling got laid and grouted. These tiles are from Romney in England. I did them on a template and had the tiles extend beyond the template, I wasn't entirely sure how well these would cut to size, and attempting to cut each individually along both long sides seemed daunting. I went with their advice, cutting with my miter saw after they were glued down. 


Here's a picture of the upside down floor as I sawed off the extra. 


Living room flooring is laid, awaiting stain. You can see my finished fireplace, chimney breast, and the chandelier I will put in here.


Dining room floor got laid on template, awaiting stain also. Temporarily hung the chandelier - love this one!


Tuesday, January 03, 2017

French Country Decorating

Once the tapewiring was done, the decorating has begun. I decided I'd try ceilings - get a textured ceiling done. I used Lomax fine texture additive in my paint, and rolled on at least 2 coats. While the second coat was better, I wasn't liking it. The sanding commenced, as I was going to apply ceiling papers instead. Funny thing, once they were sanded, they were nice! So that is what I'm going to stick with.

The first floor (Living, dining and foyer) has 12" ceilings, and most wallpapers are not that tall, So now I had to make a decision - find and use 12" papers or do chair rails. I've had a challenging time deciding what papers to use, between the ceiling heights and the desire to be somewhat cohesive in the colorways.

I love Itsy Bitsy Mini paper, but hers aren't 12". Brodnax is the perfect height, but not always the perfect pattern/color. Itsy Bitsy Mini won out for the kitchen - a yellow plaster finish. The study got her plaid - I love this plaid!

Living room and dining room are getting Brodnax, and I found a fabulous wainscoting for the Living room as well. Its a World Model white embossed one - my local mini shop owner brought it to my attention.

Foyer was a bit of a challenge, found a creamy swirl pattern that I think will work. Here's how 4 first floor papers look from a side view, as I was contemplating them.


Kitchen in process...


Study is looking nice!


Living room paper and wainscoting set up, with chimney breast I made. Note the marble hearth I plan to use. Paper will go over chimney breast. 

So here (yes, after I have the wallpaper on, I decide to take the picture, doh!) is how I made the chimney breast. My first but it gets the job done.


Turned out really nice! Can't wait to get the sconces and wainscoting up:


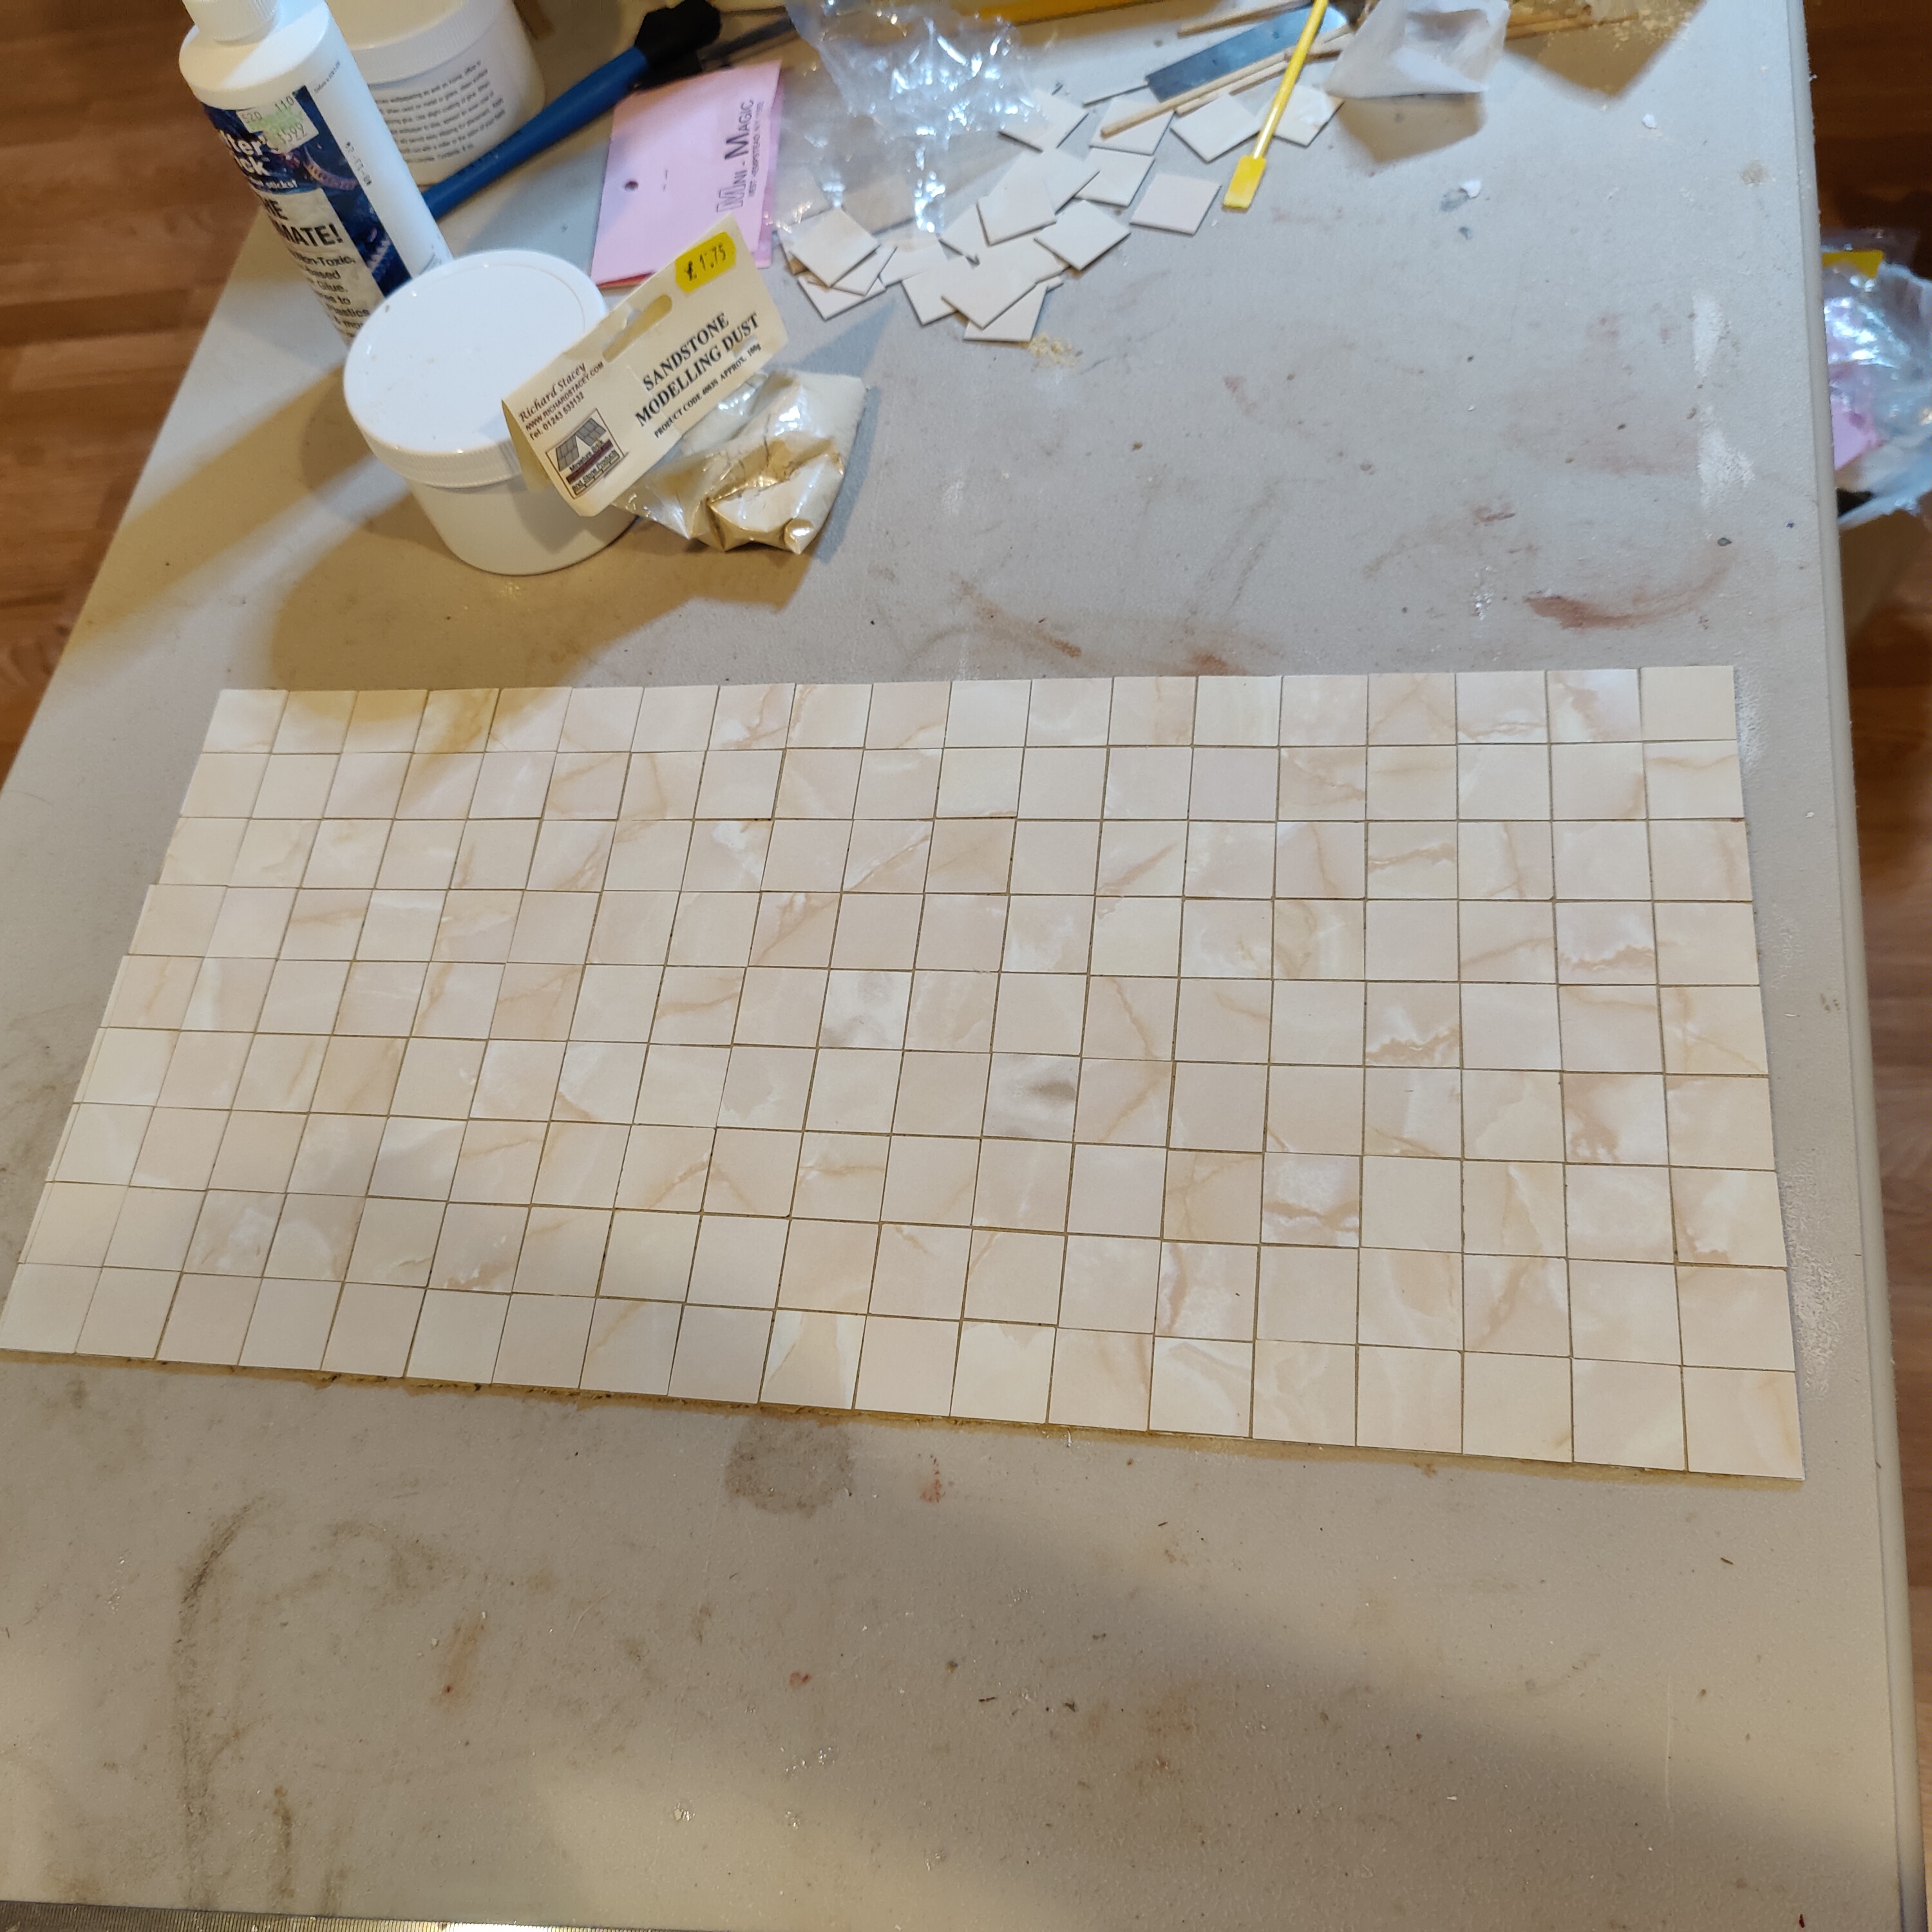
I have wanted to use these formica tiles for years, and bit the bullet. I bought a Chopper II so I could cut the larger tiles, and then used my Easy Cutter for the small black inserts as needed. These are Tid-Bits that I have had since 2007 - they are no longer available. 


Wednesday, May 21, 2014

Recent work on the Thornhill

Meant to get a shot of the 3rd floor plaster walls. OK added this too...

In the meantime, here's the shots of the baseboard, the dry dining room tile and the stairs in process. And I ordered from Earth N Tree the 3/8 cherry stripwood for the 3rd floor. I'll take a picture of my template - its done with "For Sale" signs from a hardware store. See below.

I actually used these same signs for the ceiling 'template' that I attached my bead board to.


Wednesday, May 07, 2014

3rd Floor

I now have the center 3rd floor room and the one on its left plastered. And the first coat of base paint is on the center room. I think the color will be like the living room - very light yellow/antique white with a wash of a yellow and maybe coral.

My billiard/pool table arrived, along with my small bar and pub chairs. I love them - they will fit in there nicely. I'm sure I need some other furniture - a comfy chair and bookcase, footstool, some art for the walls. I got some liquor bottles and some bar accessories - olives etc. 

The wood floor for the 3rd floor has presented me with a dilemma. I don't have enough of the 1/4 inch cherry stock, and the rest of the house has 3/8 stock. Earth n Tree is out of stock and I'm waiting on a reply from SH Goode. Those rooms are large up there, and require a fair amount of wood. I feel like I should maintain continuity and do the same cherry wood as the other rooms below. I did, however, get my template cut out for the center room - with appropriate cutouts. I used those polystyrene For Sale signs you get at the hardware store. Incidentally, I used this same thing for the base that I glued the ceiling bead board to. Worked like a charm, and was easy then to simply glue onto the ceiling. 

Moving on to other things, I stained some baseboard and the stair steps and railing for the 2nd floor stairs. The base stair risers and back will be white - for the stairs to mimic what I have on the first floor. Am now ready to install baseboard on some of the rooms. 

My dining room 'star' tiles arrived today and they are now glued on - so this weekend I will be grouting the floor - finally!

Monday, April 07, 2014

Dining Room Floor Redo

I haven't been happy with the old dining room floor - an attempt at a paperclay floor. A few years ago I redid the kitchen floor with real adobe tiles. It was quite a job - hacking away. Such an unpleasant job that I've put off doing it to the dining room. Until now.

I had planned on doing the same floor and had purchased enough tiles from the Italian tile artist. I pulled all that back out and decided that not only would I do this, but I'd add a 'star' of 4 tiles near each of the corners - jazz it up a little. I only have one of those stars, but as it just so happens, the Chicago Miniatures show is this weekend and she will be there. I'll grab the remaining 3 sets this weekend.

Here's my planning of the stars:


And tonight I attached the template and began gluing the tiles. 


Finished, and placed the star temporarily to get a sense. I have a few half tiles to place at the very back. Will get to those when I affix the stars this weekend. I'm very happy with it!