Showing posts with label lights. Show all posts

Sunday, May 01, 2022

Chateau 2nd Floor Lights & Miniature Finds

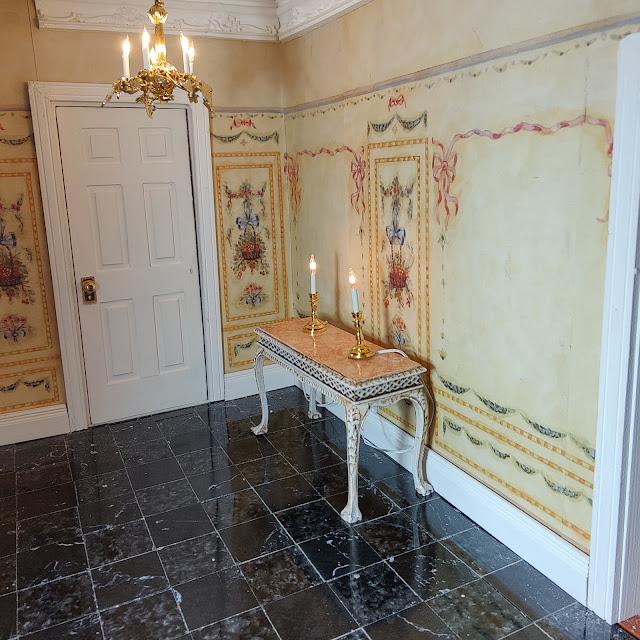
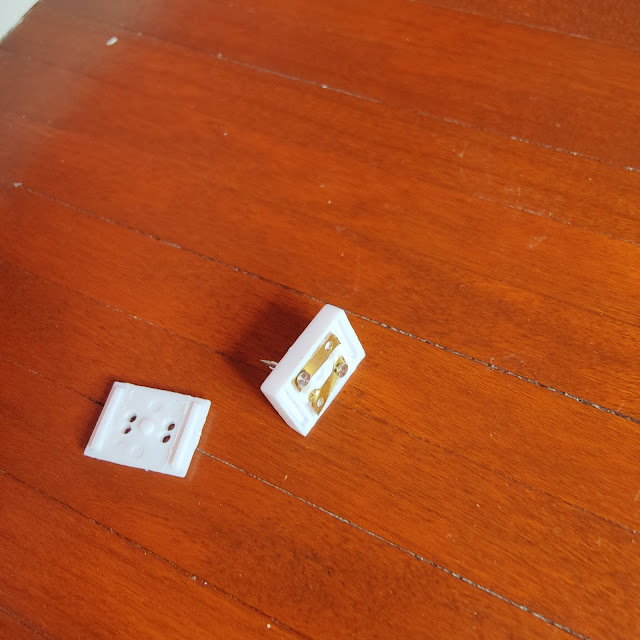
I nabbed 2 chandeliers at the Chicago Miniature Show this weekend and was anxious to get them installed. This truly finishes each room. 

I got a unique chandelier from Live a Little Miniatures and another Clare Bell Brass one. I already had one Clare Bell Brass, so those 2 went into the bedrooms and the hall got the fancier unique one. I'm  pleased with how these chandeliers look. 

Also you will notice some other finds from the miniatures shows. The rooster is from BB Miniatures, and the bench and pillows are from Wilson Santiago Dollhouse Linens and More. The bust is from Ron Hubble. The sunflower vase is from Miniature Cellar

That cute teddy bear in the bedroom and the cat in the hall are from Purple B Emporium and the blue box on the floor is from Wagon Mountain Miniatures. I just learned about their painting style. Hinderloopen art - "Hindelooper art is a type of traditional decorative painting originated in the northern province of Friesland, The Netherlands." I guess its Norwegian Rosemaling. The cream basket with green is from Vilia Miniatures

In the master bedroom the 3 drawer decorative box on the bombe chest is from an artisan in Italy - Alemikimikiri


Monday, January 03, 2022

Chateau foyer plug-in lights

Time to revisit the mini-plugs and outlets that I have used in the past. The chandelier lights in some of my houses are not very bright and I need to supplement with lamps. And I have some lamps that I want to use, both in this house and in my French Country. 

These tiny plugs and outlets are indeed a challenge. I stocked up on some, purchased directly from Cir-Kit Concepts. I had a few left-overs but would need more. 

I can't tell you how lucky and happy I was when my first outlet in the Foyer went in without any problems! I also was successful with wiring the tiny plugs on the candlestick lamps. In retrospect I think the reason these lamps were easy is because the wires on it are thicker - they are standard Cir-Kit candlesticks I had on hand. The lamps that I've purchased -can't recall the brand - have these really thin wires. I was first using the old mini plugs that you feed the wire into the side and out through the back and push in a pin. 

I found that there was a newer version that has hollow tubes and you feed wire in and use super glue. This version plug works much better, and helped with my success. I'm very pleased!

Now, I also need these outlets in my French Country, and started to install them, only to be sorely disappointed. These new ones I got - 2 of them, mind you - 'broke', the fronts broke off as I was pounding them in. I had used my old one in this Foyer, and had no problem. I had one more old one (in yellow package on right below), and was successful using that. So I have tapped Cir-Kit to see if they have old stock.


Tuesday, July 27, 2021

Chateau wiring continues

 This is mostly for reference later so I have a visual reminder if I have to troubleshoot.


Wiring for kitchen - going up to peak and over inside the roofline. I will be able to hardwire at the top.


The black is liquid tape (I should have waited for the white bottle for the walls, I will need to paint over it) and it will add insulation over the eyelet connections. 

Here is the foyer connection, with liquid tape. I learned the hard way about coach lights and glue, and ruining some Lawbre coach lights and one of the new black coach lights. The black coach lights have adhesive stuck to the back of them. I wanted to glue them, the exterior wall surface is a texture and the adhesive won't stick long term. In removing the adhesive, I pulled the wire and broke the wire connection. So, I researched this and found the recommendation to use liquid tape. This time I carefully picked away some of the adhesive, and then used my liquid tape. When dry, I was able to successfully add glue (Quick Grab) and adhere them to the wall. 

This liquid tape replaces scotch tape and insulates the connections. 


Chateau lighting

 I've been going through my stash and here's what I have so far. Not sure what goes where yet, though I did install the front exterior coach lights. 

Some Clare Bell, but the one I'm really stoked about is my J Getzan! There is one here that may also be a Getzan but I'm not sure, it has the little grape leaves. Edit 10/5/21 - Yes, the grape leaves is a J Getzan (Rosette Chandelier 104G)


Saturday, January 09, 2021

Sunday, August 16, 2020

French Country bath lighting installed

 Finally decided to bite the bullet and direct wire the 2 lights I have for the bath. It was challenging to work in a small space, after having cut the wires shorter and then not having glued on the lights first. Ah well what is life except challenges anyway?? 

These are old discontinued Cir-Kit Concepts lights with rose shades, and they add the perfect rose glow. I'm very pleased with the results. I had previously experimented with LED battery lights and I really hate having to switch each light on. 


Sunday, July 05, 2020

Bathroom

I finished the flooring in the bath, applying it to cardboard so that it would sit smooth. I also finished the chair rail and wainscoting.

You will notice I have lights here - these are battery powered lights. I still may try hardwiring some lights I have directly to the ceiling where there is tapewire. I think the wiring would be hidden. 


Saturday, January 05, 2019

French country work done

I now have the 3rd floor hall papered and at least the chair rail added. Still need baseboard and crown. I spackled the window space today and will need to follow up with sanding and paint touch up.


The study also got lighting today. I drilled holes through the beams and the ceiling for this. Then I glued down the attic to the first floor - no longer have a fear of committment! Tapewire was next, followed by eyelets for the electrical connections. Finally wiring the Lighting Bug lights! 


Sunday, November 25, 2018

Challenges with French Country Manor

I've been stalled for a while on this house, I think its been some challenges I've had and haven't figured out how to handle them.

Doors
The doors and the fanlights have presented some challenges. The doors fit from inside the house (unlike most other houses) and then there are 2 fanlight pieces - one for outside and one for inside. The inside width of the fanlight is slightly wider on either side than the door width. I will have to add a strip of wood to the door frame...maybe a 1/4 inch or so?


Then, I will also need to add a small strip of threshold to the exterior so it fills the small gap between the slate out on the terrace. This is mostly due to the use of cardstock I used on the arch walls for my wallpaper, just enough thickness to cause this. 

Windows
I've been debating on color for the windows. I started out with white, and was fine with that, until working on the Study. White looked too stark and I chose a more tan color (Folkart Linen) for the beams, crown and baseboards. I also did paint one door this same tan...but I'm undecided. 

There are a ton of windows (thirteen), so I have lots of work ahead of me.


Kitchen
Deciding on the cabinets, which, and the placement, and finish is a big one. I just repapered the kitchen for the 3rd time and like it so I'm starting to consider the finish. I'm thinking about lightly distressed cabinets, a cream over a darker stain/paint and the distress would show the darker. I have the pieces I bought from M&R Miniatures so I need to do some test finishes. 


Kitchen lighting
I love the look of the Study ceiling beams and crown and think that this is how I will do the kitchen. ceiling. As for lights, I'm not sure yet what to use. 

Study lighting
While I have the lights for this room and know the placement, I haven't yet done the work of wiring. The 2nd floor wing is removable and I haven't committed to attaching it. Its been a fear of committment! 

I have to wire the 2nd floor, and while I have a lead up there, once I add more tapewire and do the eyelets, I have committed. 


Sunday, November 19, 2017

Electrical problems in Dining Room

I had all the fireplace and sconce lighting working and I was cutting and fitting baseboard. I had noticed the floor overhung on the front of the house about an 1/8 inch and slid it out to trim the back edge of the floor. I hosed my wiring job when sliding the floor back in.  While groaning and trying to figure out how I could fix, I noticed that none of the 2nd or 3rd floor lights were working either.

I started to panic but was able to deduce it was the lead going upstairs. I was able to slide out the foyer floor, and add another cross run of tape, joining the run that goes upstairs - that took care of that - whew!
I still have to fix the dining room sconces and fireplace lighting. 

So...I decided to again change the kitchen wallpaper. I've been struggling with what to put in there. I had a few papers picked out, and oddly enough my local shop had a house they were papering for a customer, with one of those choices in it. That sealed the deal and I ordered it. So.....since I would be removing the kitchen paper, I would rewire the dining room sconces through the wall into the kitchen before I paper. I also removed the dining paper from the fireplace wall, and then I'd have access to all the wiring. Then, I reinstalled the chimney breast and papered over it as I wallpapered the wall, the right way of doing it.

So I also had to remove all the crown I just put up on that wall....and once lighting was installed and tested, completed the crown and baseboard. 

Kitchen wall where I drilled to rewire dining room sconces


Wednesday, October 25, 2017

Study

The study floor got ruined when I tried to add a second coat of stain, so back to square one. I have had success with Brodnax parquet so I went that route. It turned out very nice, almost too shiny. 

Here you can also see the ceiling beams I put up, and baseboard I've cut. I decided white was too white for this room, so I went with a tan color. 


This picture shows the beams and crown and they are painted tan. You can see the lights I temporarily placed to get a sense of what the finished look will be.